Tuesday, May 26, 2015

A wreath for my front door

I have been seeing beautifully decorated front doors with gorgeous wreaths for the Spring since early March. Unfortunately I was buried in snow back then and nothing seemed Spring like around here.
I know I am behind the ball game here, but finally last week I had some time to dedicate to my front door.
I went to Michaels and I got  a wreath for $16.00, I knew if I hunted around the thrift store for a while I could of done better price wise, but I didn't want to get to this project at the end of the summer!! :)
One of my favorite flowers are peonies. So I got a few of silk ones at Michaels as well. I guess being late in the season had some benefits as they were 60% off!! :)


 The process was very easy. I just inserted the flowers steams into the wreath, and tied them up on the back with some twine.


And there you have it. It was very easy!


 I added a couple of flags for the Holiday. 


I have no green thumb what so ever, so my ferns are looking very sad. I have been feeding and watering them religiously in hopes they will come back!

Thanks so much for stopping by! I hope you enjoyed my project! 

XOXO


Sunday, May 24, 2015

Happy Memorial Day!!

Hello!!
I hope y'all are having a fabulous Memorial Day Weekend!
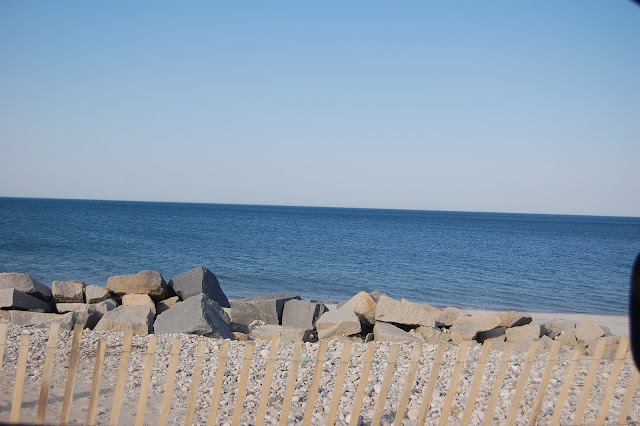
We had dinner with some friends on Friday, did some yard work on Saturday and enjoyed our first beach day on Sunday.  The weather was beautiful and the beach was just perfect.
We are very lucky to live only 15 minutes from the beach, so we go very often. We brought our portable grill and cooked dinner at the beach.


Our beach has two parts. One with a parking lot where all vehicles have access to.
But if you have a 4x4 you can continue to drive farther down where there is more beautiful beach.


You need a four wheel drive because there is no road. It is just a path of sand. 


There are some beautiful summer houses along the way. 


This one is my favorite and I call my "my house" :)


Isn't it gorgeous?


Dinner was delicious. Simple hamburgers and hot dogs taste so much better at the beach!!


The kiddos enjoyed their dinner in the back of the car. 
And the adults had a little holiday flare! 


Thank you so very much to all the amazing veterans who served our country! You are true Heroes. 

Happy Memorial Weekend to y'all!!


XOXO

Cristina


Friday, May 22, 2015

A quick project!

The stomach bug has hit our home and my two boys took turns being sick. Yesterday everybody was healthy again and back to school, so it was my first free morning in a while!!

I wasn't planing on doing this project but tiding up the laundry room it hit me and I got to work!!

I had this two small wooden signs, I must of buy them in Spain (since they are in Spanish) who knows when, they say "Laundry room" and "Iron" They came with a little glue sticker in the back to be glued to the wall.
I had them on top of other laundry prints for a while. But they always looked kind of lonely and sad. Too small... A few months ago we got some pedestals drawers to put under the washer and the dryer. Now with he washer and dryer being so high I had to move the pictures up and there wasn't room for this two signs to be hung above those pictures any more.


I have quite a collection of frames in a box in my garage. I dig one out that will work great to frame those two signs together. Look and me and hubby back in the day! That was his 40th birthday cursing to Mexico!


I dry brushed the frame with some blue paint from a Benjamin Moore sample color that was in my paint stash. 

I lined one of the card boards that came inside the frame behind the picture with left over burlap. I sprayed some fabric glue to it to keep the burlap in place.  You can see some of the glue thru the burlap now, but once it dries and the signs are in place, you cannot see it anymore.


I apply some extra glue dots to the back of the signs for more support and used the mat that came with the frame.


And there you have it!


A very easy and quick project on a wimp!! 

Thanks for visiting! 
XOXO

Cristina

Thursday, May 21, 2015

Shiny Silver!!

I have a collection of silver on my dining room. Most of it came from my home in Spain.

I remember when I was little my grandma and her sister used to get together at my house and spend hours and hours polishing my mom's silver. How lucky my mom was, right?

Well unfortunately I do not have any silver polishers around or the time to do it. So I let it go for a very long time. It all gets black, and drives my mom crazy. Every time I show pictures on my blog of the black silver I get scolded! I actually kind of like it better with some patina!

I am so excited I found an amazing trick on Face Book to polish silver. So I tried and guess what, it worked!!! ALLELUIA!!! It was easy piece too!!

This is what you need:

  • A tub, or your kitchen sink ( a place to dip your silver into)
  • Aluminum foil
  • Salt
  • Baking powder
  • Very hot water

Line your tub or sink with the aluminum foil, add 2 TBS of salt and 2 TBS of baking powder. Put the piece you want to polish inside and pour very hot water. I poured it from my tea kettle.
Let it soak into it for about 5 minutes and voila!! Some pieces took a bit longer, but it works pretty quick!!


This is how it looked.


I started with the silverware, look at the before and after of the knives. 

Before

After


Look at this spoon. The tip was out of the solution, see the difference? 


The pitchers didn't fit all the way, I guess I could just add more water, but I just turned them around after a few minutes. 

Look at the difference. 


I am so happy I found this recipe!! 


Now everything is shiny and sparkly!
Are you happy mom?? :)

Thanks for visiting!! 
XO
Cristina

Wednesday, May 20, 2015

A dress for a table!

Years ago I rented a space in my local antique mall. The walls were kinda dirty and had lots of nail holes from the previous tenants.
I wasn't allowed to paint, so I covered the walls with Burlap. Long story short, I no longer have that space but I had lots of burlap!! :)
There is a table in hubby's office holding the computer router (it's inside the basket), phone and lighting. It is a skinny long table designed to be placed behind a sofa. A friend gave it to me in a previous life (before kids) and I painted it black long time ago!


As you can see, there is just nothing appealing. Looks like a sad mess!! and all the cables from computer, lamp and phone were exposed underneath, driving me crazy!

So the light bulb on my head went on and I decided to cover the whole thing up. I've seen some burlap table covers on Ballard's Design and I loved the look, so I got to work and gave my yards and yards of burlap a new life.

Now keep in mind that I am not a pro at all when it comes to sewing, in fact I really don't know what I'm doing, I just plan as I go. Making this dress for this table was kind of like putting a big puzzle together.

First I cut a piece of burlap for the top of the table, so I measure it and left about 1/2" of extra room for seam allowance. I did the same for the front, back and sides.


I marked the 1/2" for seam allowance with a marker to help me keep a straight line of the same measurement all the way down. 

Burlap is kind of hard to work with because it gets very loose on the edges, so I run the machine in a zig zag stitch to hold it together.


Then I divided the height of the table in three because I wanted three ruffles. I cut three pieces of burlap of that height, but twice the length of the table to have enough material to ruffle it. Are you following? I know my explanations are not very good! 


A trick to cut burlap straight is to find a threat an pull it all the way out, that gives you like a lane to cut straight. 


Once I had all the pieces cut and ready, it was a matter of putting it all together. I like to put all the pieces and pin them over the table, that way I can see how is fitting.

First I sewed the top, the first ruffle the sides and the back together. Once that was in place, I just sewed  the rest of the ruffles to the skirt of the table. Makes sense?


Again, since I really didn't know what I was doing, it took a lot of thinking and a lot of going back and forth from the table to the sewing machine...

Before all the sides were sewed together, the burlap was very slippery making it hard to stay in place to figure out the next step. 
That's when a five year old comes in handy. Yup, I laid my five year old on top of the table to keep it in place. He was the perfect size for it!


And here you have it!!

New lamps from Target. 


Now if I could just get rid of the sports pictures... 


It's not perfect by any means, but it does the trick!!


 Thanks so much for stopping by!!
XO

Cristina

Sharing with: